6 Home Repair Secrets from the Pros
Whether you desperately need something fixed, or you’re simply tired of looking at eyesores on your walls or floors, and you want to keep it frugal – how about learning some minor home repair tricks?
Tackle these 6 home improvements by following our step-by-step guides:
1. Patch a Drywall
For small holes, like those created by a doorknob, you can use a patch kit. Start by placing the self-adhesive mesh patch over the hole, and then use a drywall knife to cover the patch with lightweight joint compound. Do this in a crisscross pattern, making sure the edges blend with the wall. Once the patch dries, apply a second coat of compound if needed, and then smooth it by sanding.
For medium holes up to 6 inches, such as the ones created after you’ve moved a recessed light, a pendant light, or an electrical box, use the California Drywall Patch.
Cut a piece of drywall, or sheetrock, into a square shape 2 inches larger than the area you want to patch. Cut the back of the drywall with a box cutter or knife about an inch on each side. Detach the gypsum, leave the paper backing intact, hold the patch over the hole and trace around the gypsum square. Cut out the traced square with a drywall knife, first checking the hole for electrical wires (most commonly attached to studs).
Next apply the compound to the back of the paper border. Put the gypsum into the new hole, press the paper borders along the outer edge of the hole, covering the whole patch with joint compound so that the lines blend in with the rest. You may need two coats of compound, just let the patch dry in between coats. Sand for a smooth surface.
You’ll also need to either touch up patched areas, or consider repainting the whole wall. If you’re patching numerous holes, prime the patched walls first. This is especially important if you’re choosing a semi-gloss or shinier finish.
2. Fill Nail Holes
Instead of searching for a wax filler stick to fill in the holes on your walls, wood panels, etc., in a similar color as your stain or paint color, how about simply using – a crayon! It’s more frugal and you don’t need to look for a hardware store.
If you have kids at home, chances are you have crayons; if you happen to have a big box that contains dozens of crayons, you almost certainly have the color you need for your walls. If not, you can find crayons in your nearby Target and even in some supermarkets.
For small nail holes, find a matching crayon and, with firm pressure, rub over the hole to fill it in. If you get a little crayon outside of the hole, simply take a dry rag and wipe over the area, and the crayon will come right off.
For larger nail holes, make the crayon a little bit soft and malleable first, so it sticks in the hole better. You can warm the crayon with a lighter, just be careful. The goal is to make it just a little softer, then rub the soft crayon over the hole. Once the crayon in the hole sets, you can rub off any excess with a dry rag.
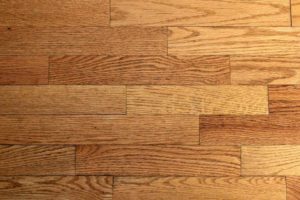
3. Fix Scratched Hardwood Floors
Refinishing the entire hardwood floor area may not be in your budget, but there are all these scratches that make it look old and not so attractive.
Here’s an easy, temporary fix with a product called Howard Restor-a-Finish. It’s great for spot touch-ups and as a short-term fix on small wooden surface scratches throughout the house. It will make deep scratches much less noticeable, and make less intense floor scratches practically disappear. You should choose a color close to the shade of your floors.
Clean the floor first. Cover the scratched area with a bit of the Restor-a-Finish. Use a paper towel to rub it into the scratched areas. You may need to repeat three or more times, each time using a clean towel. The result is a more polished, smoother floor!
4. Repair Parquet Floors
Parquet floors consists of rectangular blocks of wood that, over time, may become damaged or loose through wear and tear. The good news is – you can replace them relatively simply.
Remove the old wooden block by levering; if it remains firmly stuck, try to break it up by using a hammer and chisel. Use a scraper to remove extra adhesive from the back of the block and from the floor surface.
Apply new latex-based wood adhesive both to the back of the block and to the floor surface, fit in a new block, and press it firmly into place. Make sure the blocks are stuck tight. If the new block is not flush, sand the surrounding surface in the direction of the grain until it’s smooth. Apply wax or varnish, depending on the existing floor finish.
5. Caulk A Bathtub
Begin with cleaning the area really well. Once completely dry, carefully tape off above and below where you want your caulk line to be. If you have a thick caulk line, consider peeling it off first. You can use the painter’s tape. The corners can be a little tricky so try overlapping the tape.
Next, using a caulk gun, or simply the tube caulk, squeeze the caulk on, and smooth it out with your finger. While the caulk is still wet, pull off the tape, otherwise, when dried, the caulk line will pull off with the tape. The result is a neat, perfect line of caulk around your bathtub.
Since grout needs continual maintenance, and especially in older homes, you may need to have your bathroom completely re-grouted and sealed once in a while.
6. Whiten The Old Grout
Now, how about that old grout, that, no matter how much you try to clean it, still looks dingy? If you’re looking for a budget friendly and easy way to freshen it so it looks like new, here’s how.
First clean the floors thoroughly. The product that will make all the difference is Polyblend Grout Renew, and you can find it in Home Depot. Apply it into the grout with a toothbrush, or better yet with a thin craft brush, and let dry for 24 hours. If it gets on the surface of the tile, make sure you wipe it off with a clean tile quickly before it set. Just make sure nothing gets wet for 72 hours, after that it truly sets like glue.
At Home One, we bring our expertise, reliability, and ethics to get your home in top shape.
Whether you want to revamp your old place, or do some home improvement before putting your house for sale – count on our highly trained and dependable team for all your renovations!
Trust home remodeling Lancaster, PA services we offer at Home One – call us today, and see why so many others in the area have relied on our home improvement solutions.